School Christmas Ornaments
This week's post is about the class fundraiser we held in December, where we designed Christmas ornaments based on our school mascot – the Spitfire Dragon. Using Tinkercad, we spent a week designing the dragon logo and the ornament, and then we immediately started the printing process in anticipation of sales. As a class, we assigned jobs to every student (design, painting, marketing, presentation and packaging, distribution) and, for the three weeks leading up to the December holiday break, our class functioned as a small business.
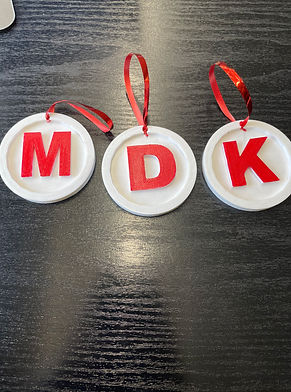
We sold Spitfire Dragon ornaments, along with custom-made ornaments that showed either a letter or a number of the student’s/customer's choice. We ended up raising over $1,000 for our school, which went towards STEM activities and equipment, athletics, and our annual Grade 8 graduation.


The Process:
Because we wanted to use our actual school mascot as the face of the ornament, we had to find a way to trace the dragon image onto a pre-made circle. One of my students was able to accomplish this task over a two-day span by zooming in and using the "Draw" feature on Tinkercad.
Once the design process was complete, we printed some dragon ornaments in gold, white, and red. These items were then sanded down, painted, and glossed, according to the colour and theme each purchaser had specified. We then tied ribbons onto each ornament, threading them through a hole that we had designed to be at the top.
We put each completed order into a small mesh gift bag, and we attached thank-you tags that we had made ourselves. The students delivered our finished products to the classrooms where the orders had originated.


Problems We Were Able to Troubleshoot:
Once we were satisfied with the look of the design, we moved on to the printing process, where we initially experienced some difficulty. Through trial and error (i.e. five or six printing runs), we gradually discovered the design aspects that needed to be tweaked (e.g. small gaps in certain places, making the eye bigger, etc.). The dragon's beard was the only detail we were unable to make as sharp as we would have liked, but with a little sanding and paint, it turned out just fine.


Final Thoughts:
This was my second year running a 3D-printed ornament fundraiser. Once the design process was complete, it was pretty straight-forward as we mostly just had to print the same file over and over again. (Each print run took just over one hour.)
This project had the ripple effect of exposing much of the school to the fact that we can design and 3D print our own objects. That awareness in turn led to many inquiries about what other items (e.g. toys, gifts, functional objects like pencil holders) we could potentially print for the rest of the school. The students had fun collecting orders, sorting money, and delivering the printed products. We even printed a coin holder to keep track of all of our sales.
Throughout this entire project – from design to delivery – every single student in my class had a daily job to perform, and that level of engagement led to the success of this fundraiser.
If your school has a 3D printer, or if you are able to borrow one, I would highly recommend holding a fundraiser using 3D-printed products. It’s a great way to spark entrepreneurship in young minds, all while teaching a variety of practical lessons, such as STEM, marketing, design, accounting, problem-solving, team-building, and personal responsibility.
I launched my first fundraiser specifically to finance the purchase of a 3D printer for our school. I borrowed a friend’s 3D printer to create our first run of products, which made our initial goal achievable. Our school’s 3D printer has delivered a fun and functional boost to our program of STEM activities.


Links and Products used:
-
We used "www.tinkercad.com" to create our dragon, letter and number ornaments.
-
We used "Ultimaker Cura" as our slicer to adjust and customize our print files.
-
We used an Ender 3 V2 to 3D print our designs